
Garden
Rebuilding soil on a clay hillside
When we bought this block at Whangārei Heads, the paperwork called it pasture. The soil told a different story.
Decades of dairy had stripped most of the goodness out of the top layer. Kikuyu had taken over the ground like a green concrete slab, and anywhere I pushed a spade past about 150 mm I hit yellow clay that wouldn't let water through and wouldn't let roots in.
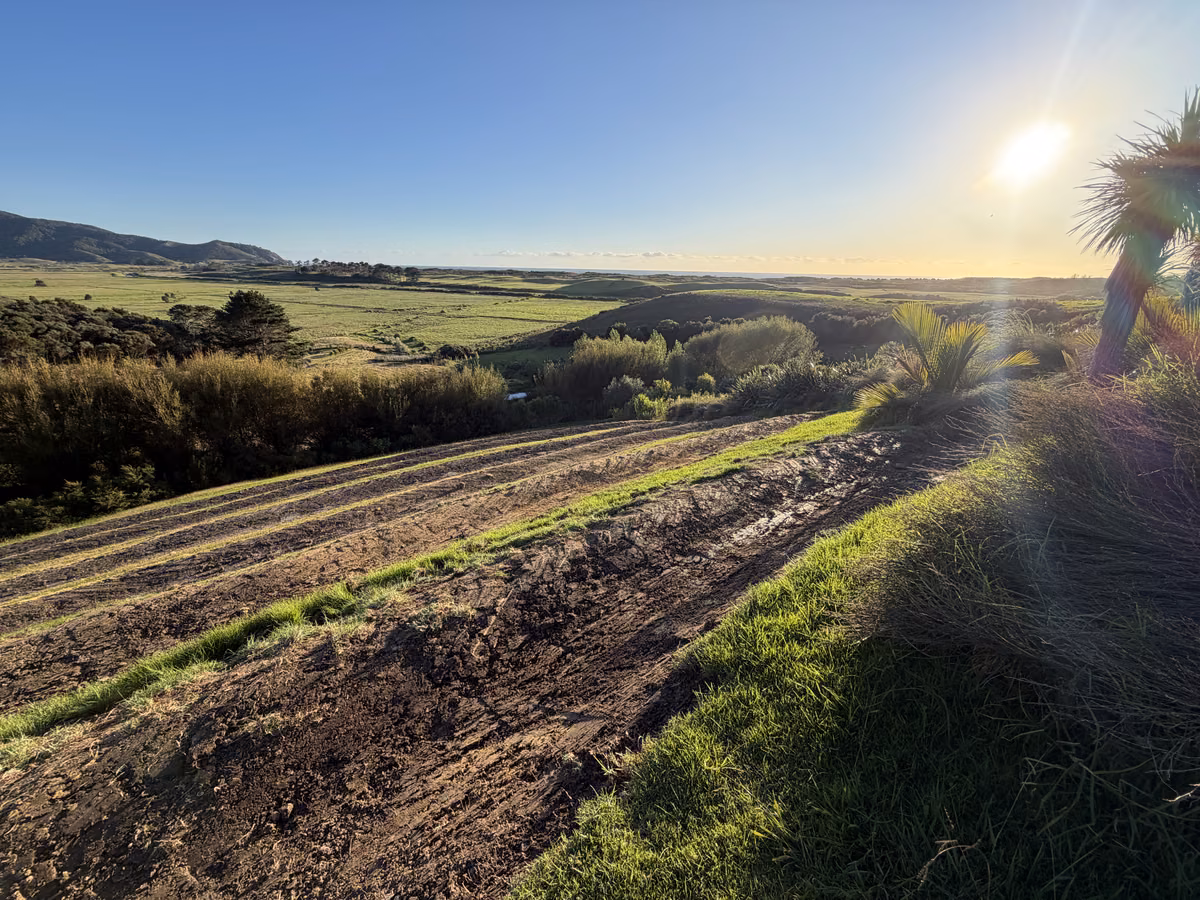
It's a north-facing hillside running from 39 m above sea level in the south down to 16 m at the northern boundary. It is wide open to the northeasterlies that come in off the Pacific at over 100 km/h in a bad blow.
Beautiful view. Rough starting hand.
This post is about the next move in rebuilding that soil. Six contour swales are in the ground, three pioneer species are going on them, and right now I'm setting up a winter nursery in the greenhouse to raise the bana grass component.
The problem under the grass
Former dairy land is a specific kind of degraded. It is not abandoned, contaminated, or eroded in the dramatic sense. It is just stripped.
Thirty years of ryegrass and clover monoculture, hard hoof compaction, urine patches pushing nitrogen out of balance, superphosphate masking the lack of biology, and a root zone that never reached more than 150 mm deep because it never needed to. The grass got what it needed off the top. The clay below got nothing and gave nothing back.
Kikuyu arrived at some point and took over the pasture from the ryegrass. Kikuyu is a C4 subtropical grass that thrives in exactly the conditions dairy farming creates: compacted low-biology soil, plenty of sun, and regular disturbance.
It spreads by stolons that run 15 to 20 cm deep, throws up a dense mat that outcompetes almost everything, and produces allelopathic compounds that suppress native and garden species alike. You cannot cultivate it out. Every piece of rhizome you leave in the ground becomes a new plant.
Spray it and you temporarily win a patch while the surrounding colony moves in from all sides. The only reliable way I have found to beat kikuyu is to smother it from above with something denser and faster, while also breaking up the soil conditions that favour it.
Under all of that sits the clay. My topsoil across most of the 1.5 acres is 100 to 200 mm deep. Below that is heavy Northland clay that holds water in winter until it is saturated, then sheds it over the surface, then bakes hard in summer.

The ground tells the truth pretty quickly once the grass is peeled back: a shallow living layer over heavy clay.
Plants with shallow root systems struggle. Trees with taproots can get through it, but only once they are established, and establishment is the hard part in this soil.
That is the real constraint. Everything else, the kikuyu, the wind, and the dairy legacy, flows from the fact that this is a compacted clay hillside that has not been biologically active below 150 mm for decades.
So the project is not "plant a food forest." The project is "rebuild soil biology and structure on a degraded clay hillside, in a climate that wants to blow plants over, on land that is actively fighting back with kikuyu."
The food forest comes later. First I need soil that can support one.
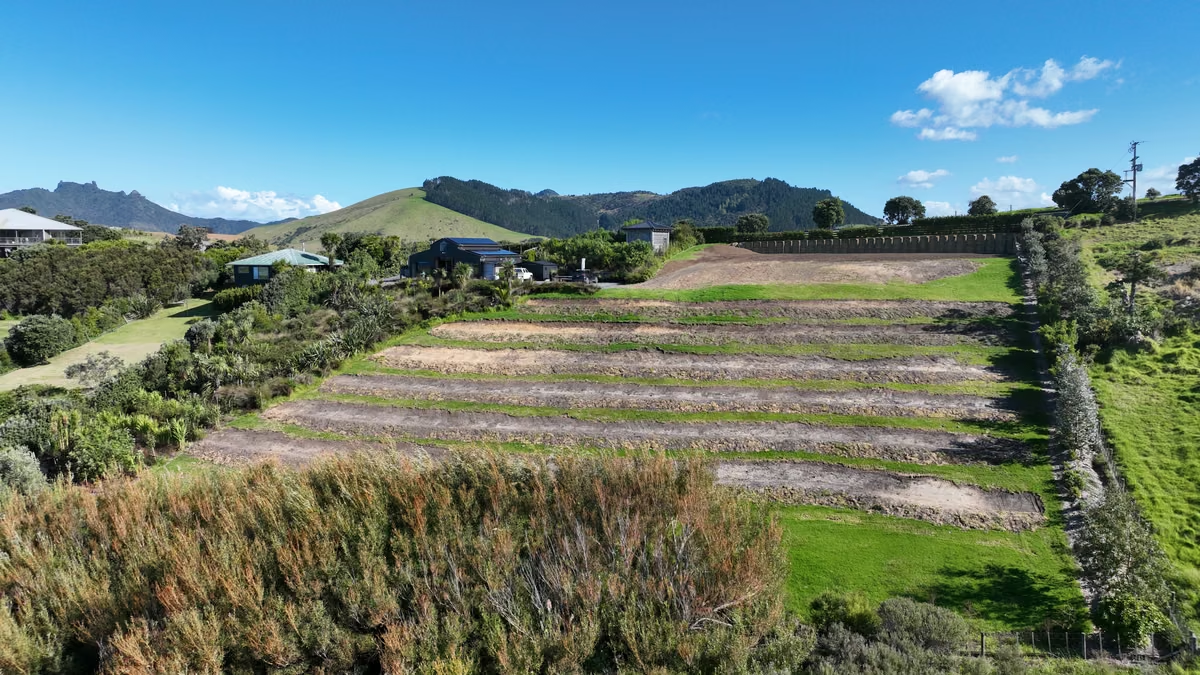
Six swales on contour
The earthworks went in first.
Six swales run east to west across the slope, cut on the contour with a laser level. Each one is sized to handle a 100 mm rainfall event in 24 hours. That is a sensible design standard for Northland because we get tropical fronts through here a few times a year that can deliver that sort of intensity in a single sitting.
Three of those events have rolled through since installation, and every swale has done its job without overtopping, without undercutting, and without erosion at the spillways. The hydraulic design is sound.
The swales turn the slope into a water-harvesting system instead of a runoff system.
What the swales do, if you have not seen them before, is simple. Each one is a shallow ditch on the contour line with a berm on the downhill side, built from the spoil.
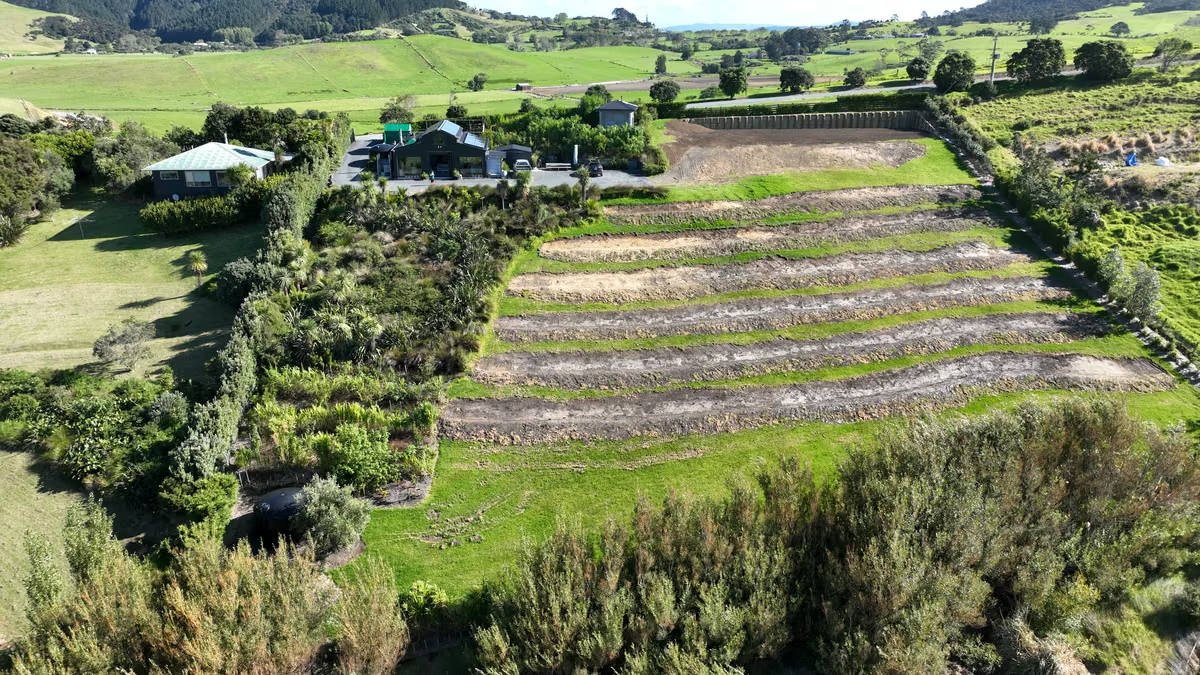
Water running down the hillside hits the ditch, stops, spreads out along the length of it, and soaks in. Instead of sheeting off the property and into the neighbour's paddock, it percolates into the clay exactly where it lands.
Multiply that by six swales running the length of the hillside and the whole slope becomes a water-harvesting system. Every rainfall event recharges the soil rather than eroding it. In a drought, the hillside draws on that buffer for weeks after the last rain.
The other job of the swales is structure. They give me six long, defined planting lines on contour. Instead of a random scatter of trees across the paddock, every planting goes on or near a swale where soil moisture is highest and most consistent.
The berms become raised planting beds with good drainage, the ditch itself is the wet zone, and the downhill toe is the sub-irrigated zone that stays moist longest. Three microclimates along a single line.
Three pioneers, three jobs
The planting plan for each swale uses three pioneer species in three distinct positions.
Tagasaste, also called tree lucerne, sits on top of the berm. That is the driest position, which suits tagasaste because it is a Mediterranean legume that wants its roots out of wet ground.
It sends a taproot straight down, punches through clay in a way almost nothing else can, and fixes nitrogen through its root nodules as it goes. It produces high-protein leaf litter that decomposes fast and feeds the soil food web. It is also the tallest of the three pioneers at 4 to 6 m, so it can provide shelter without shading out the rest of the guild.
Bana grass goes on the swale lip in two rows at 50 cm offset spacing. It is the biomass workhorse.
Under decent conditions, bana grass can produce a lot of dry matter. In practical terms, that means I can cut it back to knee height every six to ten weeks through the growing season and drop the material right there on the swale as mulch.
That mulch becomes topsoil.
Over three years, the cumulative biomass from a bana grass hedge should rebuild the organic matter fraction of the soil beneath it, with all the associated improvements in water-holding capacity, microbial activity, and aggregate stability. The fibrous root system reaches deep once mature, stabilises the swale lip, and physically opens the clay from below.
It also gives us wind shelter in month six rather than year three. And it smothers kikuyu. A closed bana grass canopy on 50 cm offset spacing puts the ground below in permanent deep shade, and kikuyu needs sun. Inside two growing seasons, the kikuyu underneath should be gone.
Tithonia, Mexican sunflower, goes on the downhill toe at 30 cm spacing. It is the phosphorus and potassium pump of the guild.
It mines both minerals from the clay subsoil and concentrates them in its soft, fast-growing leaves, which can be cut and dropped to release those nutrients in weeks rather than months. The downhill toe is also where any overflow or seepage from the swale ends up, so tithonia's thirst for moisture is an asset in that position.
Three species, three positions, three functions.
Between them they cover nitrogen fixation, phosphorus and potassium cycling, biomass production, windbreak, erosion control, kikuyu suppression, and deep soil structure building. None of it is the end state. All of it is preparation for whatever goes in next.
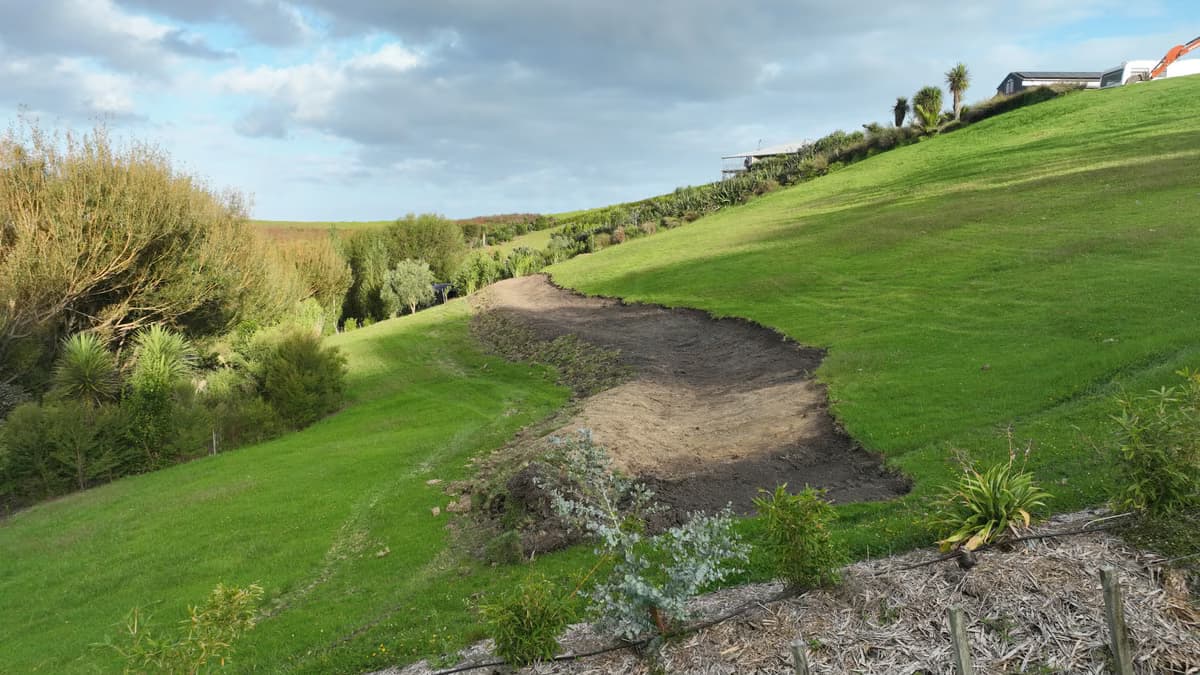
The swales are bare now. The job this year is to turn those lines into living infrastructure.
Pioneers first, succession later
My instinct from the start has been to get pioneers in the ground first and decide on the succession planting later.
That is also what Ernst Götsch teaches in syntropic agroforestry, and the more I read of his work the more convinced I am that this sequence matters. The pioneers tell you what the site can support. You read that from how they perform in year one before you commit to anything slower or more valuable.
There is no point planting a macadamia, a feijoa, or an avocado into compacted clay with kikuyu pressure and full exposure to the northeasterly. It will struggle, probably die, and almost certainly not thrive.
Put the same tree into soil that has had three years of tagasaste leaf fall, three years of bana grass chop and drop, and three years of tithonia mulch building organic matter, sheltered by an established hedge, in a soil food web that is active rather than dormant, and it has a chance.
The pioneers are not a substitute for the food forest. They are the infrastructure that makes the food forest possible.
The likely succession candidates for years two and three include bananas, pigeon pea, cassava, and sweet potato as short-cycle placenta species, then feijoa, tamarillo, macadamia, and citrus as the emergent layer once the tagasaste is producing real shade and nitrogen.
But that is a decision for next April, once I have seen how the pioneers perform through one full seasonal cycle.
Where the project is now
One swale is planted with tagasaste and tithonia. Bana grass is the missing piece on that swale and has not gone in on any of the other five yet.
The reason is timing.
We are heading into autumn, soil temperatures are dropping, and bana grass cuttings stuck directly into cool wet clay have a high failure rate. The practical minimum I am working from is 18 degrees Celsius media temperature for reliable strike, and Whangārei soil in April is already borderline and cooling.
Direct planting now would be a gamble. Instead, I am running a winter nursery in the greenhouse.

The wet, rutted track is a good reminder that this is not garden-centre soil. It is clay, water, kikuyu, and timing.
The winter nursery plan
The greenhouse is double-skinned and currently reaches 30 degrees Celsius on sunny autumn days. Outside minimums on this site have not dropped below 7 degrees in the six years we have been here.
Inside the double skin, overnight minimums through July and August should sit around 14 to 18 degrees. That is cool for bana grass root initiation, but not cold enough to stall it completely. Staggering the batches lets me work around the coldest weeks.
The setup is 20 T28 root trainer trays, 28 cells each, 150 mm deep, 60 to 70 mm at the top. That gives me 560 cells of deep, air-pruned, tapered volume, which is ideal for grass-type root development and enough depth that I should not need to pot on before October transplant.
The flood trays underneath give me bottom watering by sub-irrigation. That is labour-efficient at this scale and easier on the cuttings than overhead watering in winter.
The media is a bark, pumice, and coir blend set up for sub-irrigation, which needs higher air-filled porosity than a standard potting mix because the cell base stays wet under a flood tray. The recipe is roughly 40 percent composted pine bark, 25 percent coarse pumice, 25 percent buffered coir, and 10 percent fine pumice, plus dolomite, gypsum, and slow-release fertiliser.
In practice, I am using Daltons GB Potting Mix as the base and amending it with extra coarse pumice and coir.
The parent bana grass clumps get coppiced first, which triggers a fresh cane flush. Three to four weeks later, I cut 100 two-node setts from that fresh cane and stick Batch 1 into roughly four trays. These use the residual autumn media warmth to establish callus and initial roots before winter dormancy, then sit quiet through June to August.
In early September, with spring temperatures returning, I cut another 200 setts from the regrown parent clumps and stick Batch 2 into the remaining cells. Batch 2 should strike in four to six weeks under rising spring temperatures, and both batches go to the swales in mid-to-late October as transplantable plugs.
October is the real handover point: nursery-raised plugs into warm soil, with the swales already tested by winter rain.
Expected strike rate is 85 to 95 percent. The plan is for 300 nursery-raised plants, with the option to direct-stick extra two-node setts between the plugs at October transplant as a backup row.
The direct sticks cost nothing except labour, and October soil at 15 to 18 degrees should be warm enough to push them to a decent strike. Every direct sett that takes is free redundancy against nursery failure.
Total material cost for the 300-plant nursery run is around NZ$200, mostly media and a rooting hormone dip. The trays, flood trays, greenhouse, and parent stock are all already on hand. Labour is mine, spread across the winter.
Compared to buying bana grass plugs at retail, raising 300 of them for NZ$200 plus my time is the sort of economics that makes this project viable on a family budget.
What I am watching this year
The kikuyu will fight back. It will try to climb into the bana grass clumps before they close canopy.
The countermeasure is a heavy initial mulch ring at transplant: 15 to 20 cm of cardboard under chop and drop or straw, extending 50 cm out from each plug. Tagasaste prunings from the already-planted swale are the perfect source. I will revisit at six weeks and three months to pull any kikuyu runners before they get established.
The clay will tell me things too. If any swale toe starts seeping rather than draining after a heavy event, that is a sign the clay below is saturated and the berm is acting as a dam rather than an infiltration line.
Mature bana grass roots should make the berms solid once established, but in the meantime I am watching.
And the pioneers themselves will tell me what the site can support. How vigorously each species grows, where they thrive and where they struggle, how fast the canopy closes, how the soil looks, smells, and feels in year two.
That is the reading I will use to decide the succession planting.
It is going to be a fun season. More to come as the nursery progresses.
Related reading
Why we're embracing the principles of syntropic gardening covers the earlier stage of our syntropic planting and the first bana grass, tithonia, and comfrey experiments.
What we're planting in our syntropic garden this summer shows the first food forest plantings and what survived the early learning curve.
From creating Minecraft worlds to curating a living ecosystem gives the wider property context behind the swales and planting decisions.
Mark Smith is Principal AI Strategist at Cloverbase. To discuss this article or work with me, contact me at Cloverbase.